Adding the Estimatty widget to your website is quick and easy, allowing your customers to get instant estimates and turn your website traffic into qualified leads. This guide will walk you through the simple steps.
Option 1: Install it Yourself
This method involves copying a small piece of code from your Estimatty account and pasting it directly onto your website’s desired page or section. No advanced coding knowledge is required!
- Log in to your Estimatty account at https://app.estimatty.com/
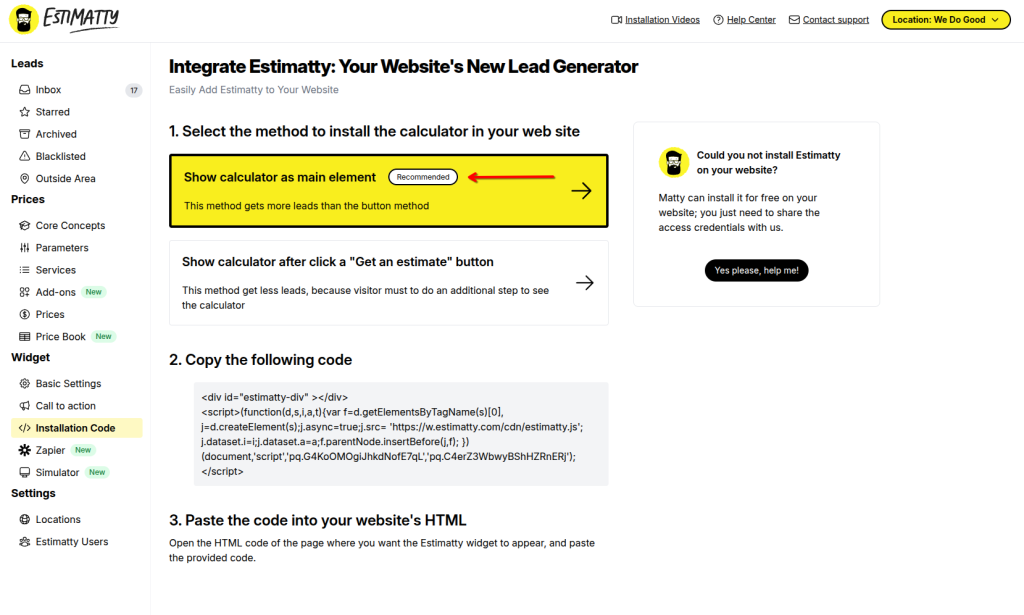
2. Navigate to the Widget Installation Code:
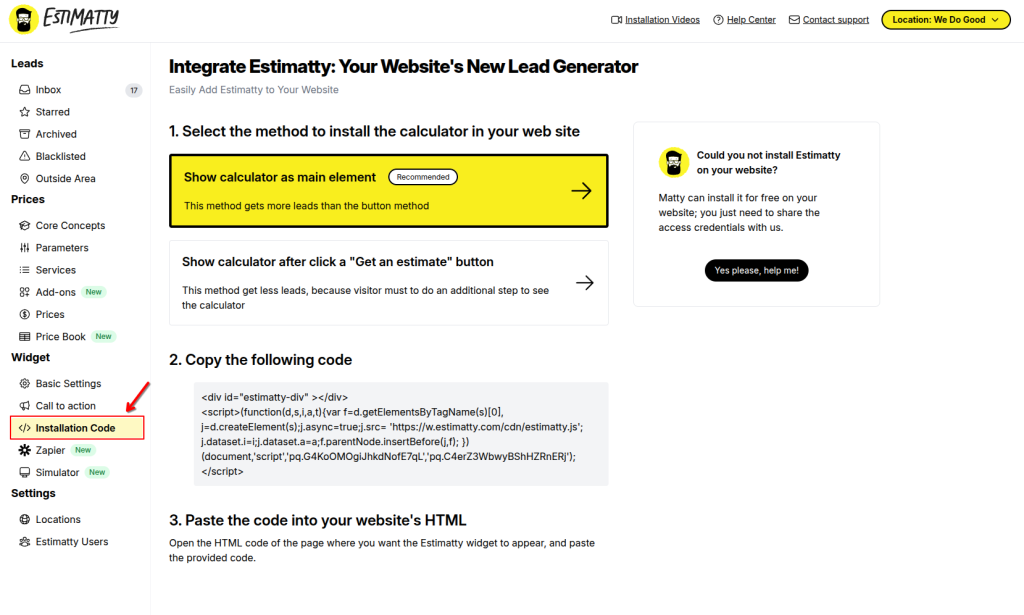
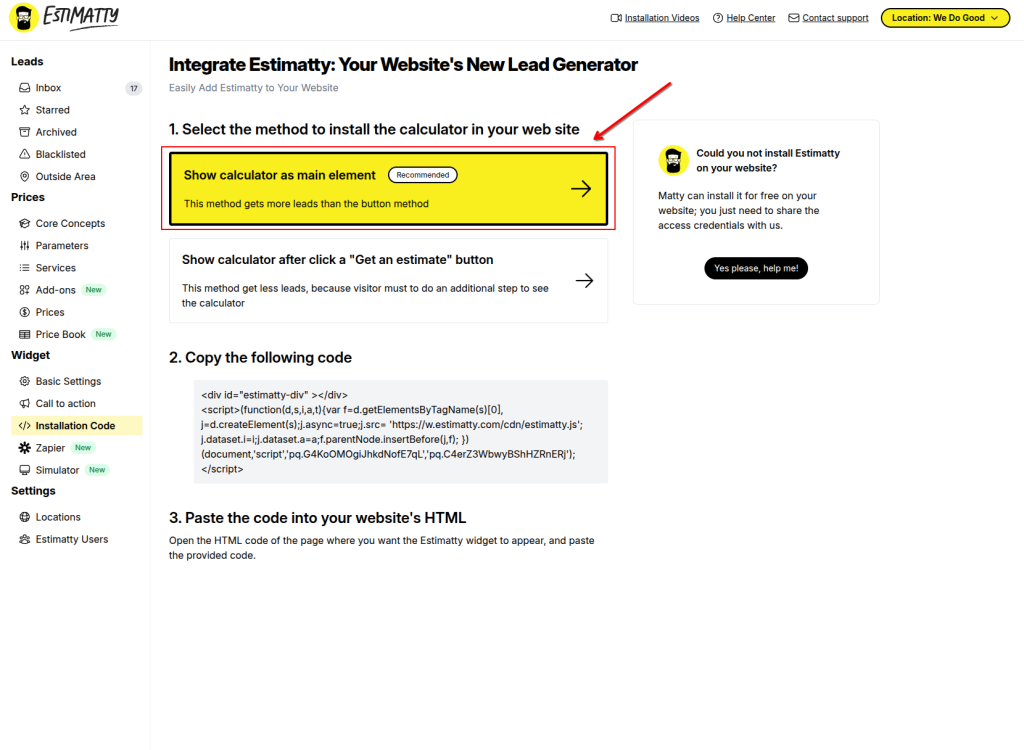
3. Select the option “Show calculator as main element”. This is the recommended method for directly embedding the full calculator into your page for maximum visibility and conversions.
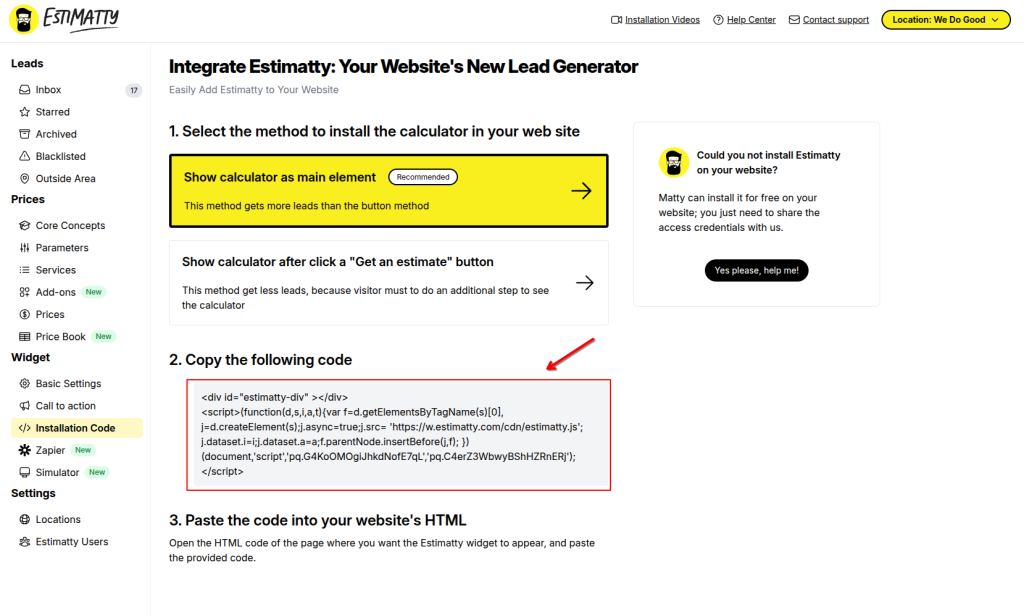
- Copy the custom code
- Strategic Placement for Maximum Conversions:
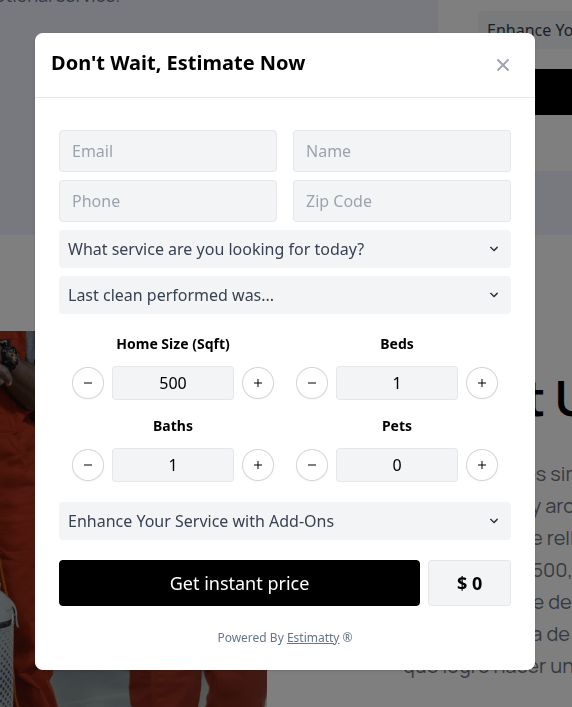
- Estimatty highly recommends embedding the widget directly onto your homepage. This provides immediate access to estimates, significantly boosting conversion rates. Take a look at this example of a cleaning company’s homepage, featuring the Estimatty instant estimator right in their hero section.

- For best results and highest conversions, consider placing the widget within your website’s Hero Section.
- What is the Hero Section? This is the prominent, often full-width, top section of your website’s homepage, usually the first thing visitors see. It typically contains a compelling headline, a brief description of your service, and a primary Call to Action (CTA). Embedding the widget here makes it immediately visible and interactive.
- The Estimatty widget code needs to be placed into the specific HTML section of the page or template where you want it to appear.
- Where to paste it varies by website platform, but generally involves adding a “Custom HTML” or “Code” block:
- WordPress (Using Gutenberg Editor – Recommended for most):
- Go to the page or post where you want to add the widget (e.g., your homepage).
- In the Gutenberg editor, click the
+icon to add a new block. - Search for and select the “Custom HTML” block.
- Paste your unique Estimatty widget code into this block.
- Drag and drop the block to your desired location, ideally within your hero section.
- Squarespace:
- Go to the page where you want to add the widget.
- Edit the page content and add a new block.
- Select the “Code” block.
- Set the Display Mode to “HTML.”
- Paste your Estimatty code into the text area.
- Drag the block to your desired position (e.g., in your hero section).
- Wix:
- Go to the page where you want to add the widget.
- Click the
+(Add Elements) button on the left menu. - Select “Embed & HTML” then “Embed a Widget” or “Custom Embed”.
- Choose “HTML iframe” or “Embed Code.”
- Paste your Estimatty code into the provided box.
- Position and resize the HTML box on your page as needed, placing it strategically in your hero section.
- Custom HTML Site:
- Open the specific HTML file for the page where you want the widget to appear (e.g., your
index.htmlif it’s your homepage). - Locate the section of the HTML code that corresponds to your hero section.
- Paste the Estimatty code directly into that section.
- Screenshot: Insert a code editor screenshot showing HTML with the hero section code, indicating the paste location.
- Open the specific HTML file for the page where you want the widget to appear (e.g., your
- WordPress (Using Gutenberg Editor – Recommended for most):
- Option to Trigger with a “Get a Free Estimate” Button (Optional Advanced Setup):
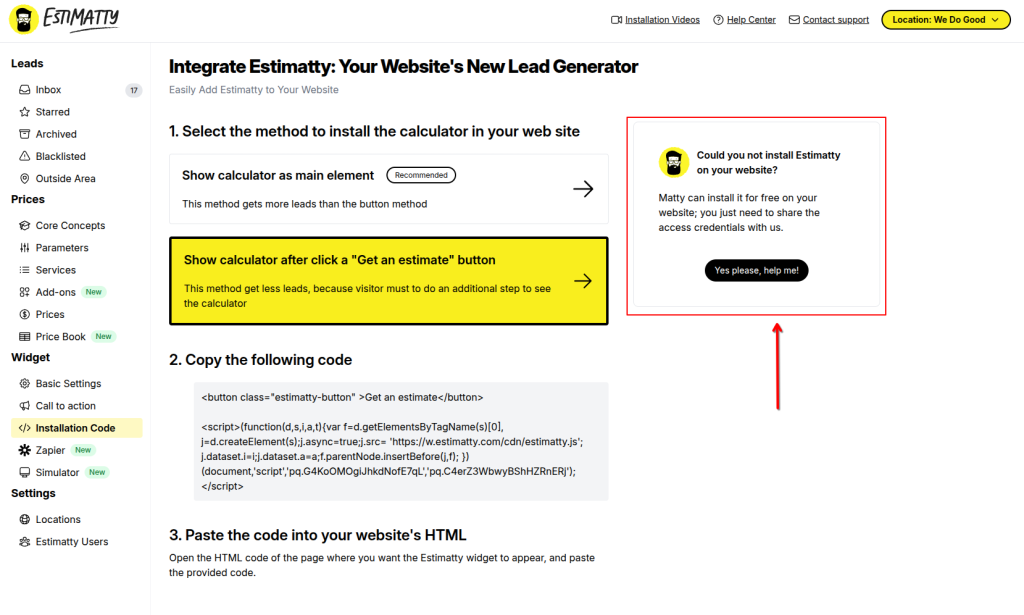
- While direct embedding is highly effective, you can also set up your Estimatty widget to be triggered by a “Get a Free Estimate” button on your site. This allows the widget to pop up when the button is clicked. Instructions for this advanced setup are typically provided within your Estimatty dashboard under the Widget settings or advanced options, or you can contact support for guidance.
- Select the option “Show calculator after click a “Get an estimate” button”.
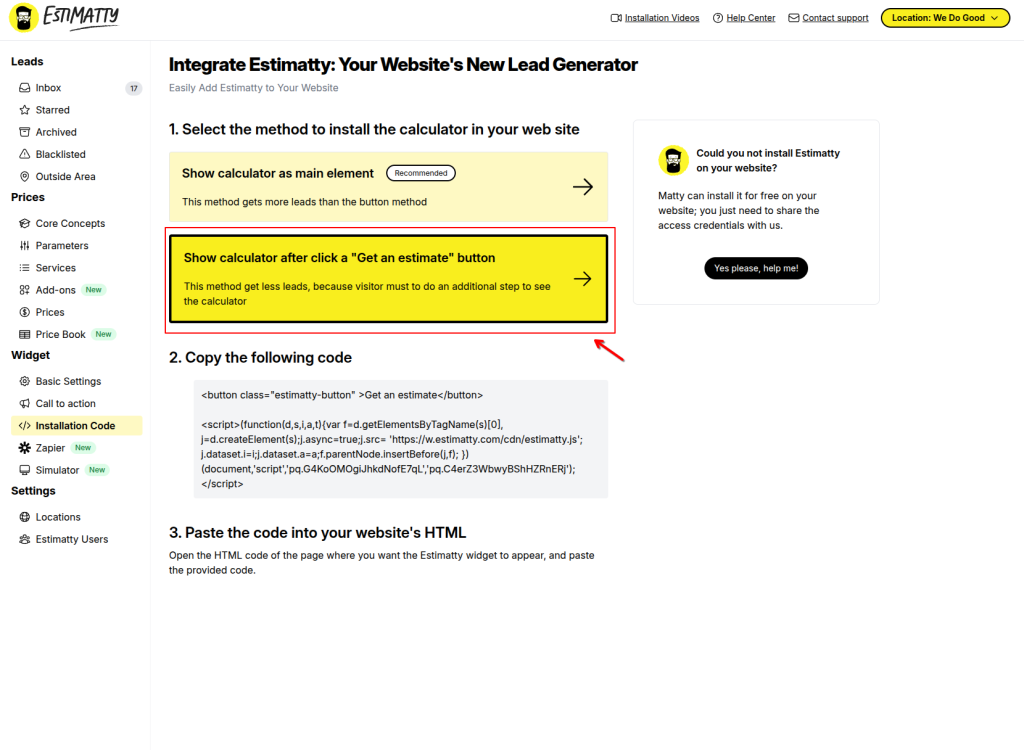
- Simply follow the same code placement steps.
- When your clients click the “Get a Free Estimate” button on your website, the Estimatty instant estimator will seamlessly appear as a modal window.
- Save and Publish Your Changes:
- After pasting the code, ensure you save or publish your website changes.
- Clear any website caching if you use a caching plugin or service.
- Verify the Installation:
- Visit your website’s live pages. The Estimatty widget should now appear.
- Test it by generating an estimate!
Option 2: Let Estimatty Install it For You (Free for All Users!)
Are you short on time, not comfortable with code, or just prefer to have a professional handle it? No problem! As a valued Estimatty trial user, our team can install the widget on your website for FREE.
How to Request Free Installation Help:
- Log in to your Estimatty account at https://app.estimatty.com/
- Navigate to the Widget Installation Code
3. Use the Help me button
4. Provide Your Website Credentials:
You’ll be prompted to provide login details for your website’s backend (e.g., WordPress admin username and password, or hosting/FTP credentials).
Important: Please ensure you provide the correct and necessary access so our team can complete the installation smoothly. If you have a WordPress site, providing WordPress admin credentials is usually the most direct way.

- Submit Your Request:
- Once you’ve entered the required information, click “Submit Request.”
- Our technical team will be notified and will begin the installation process for you as soon as possible.
- You’ll receive email notifications when we start the installation and once it’s successfully completed.
Need Further Assistance?
If you encounter any issues during self-installation or have questions about the free installation service, our support team is here to help!
- Contact Support: support@estimatty.com
We’re committed to helping you get the most out of Estimatty!