
1. Access Your Zapier Account: Open a new window and log in to your Zapier account
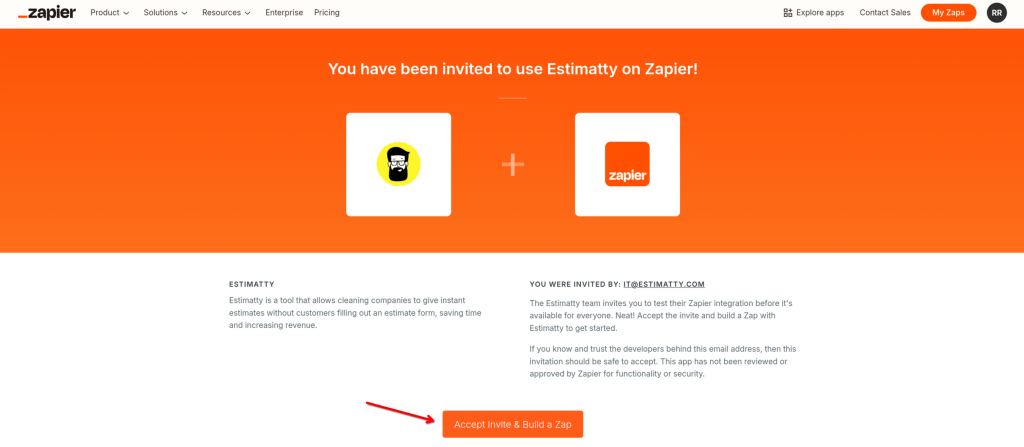
2. Access Estimatty on Zapier: To get started with Estimatty in Zapier, click this link and then select “Accept Invite & Build a Zap.”
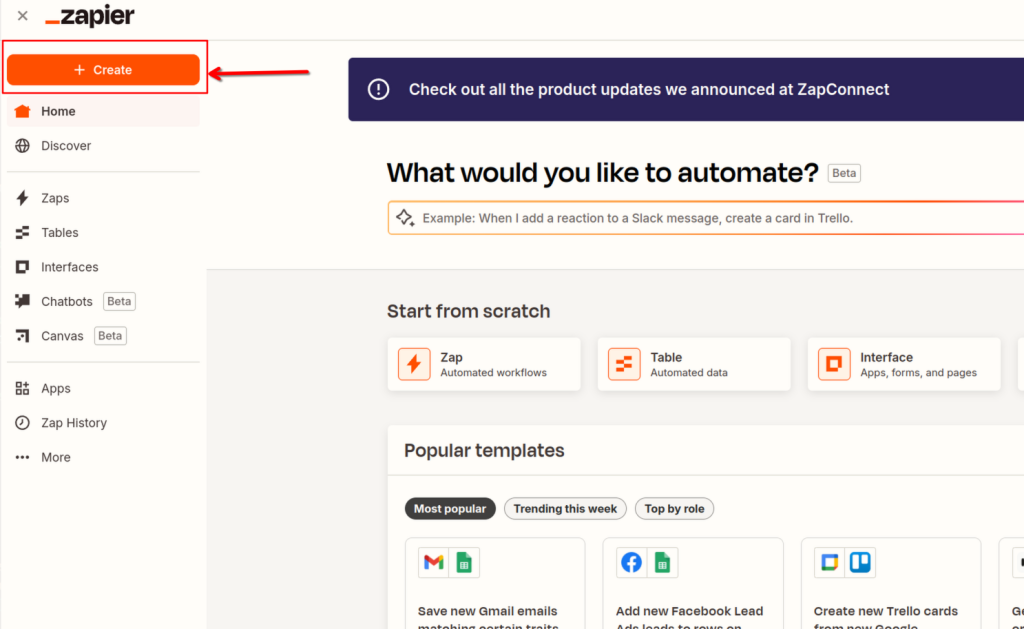
3. Create a new Zap: In your Zapier dashboard, click the “Create Zap” button.
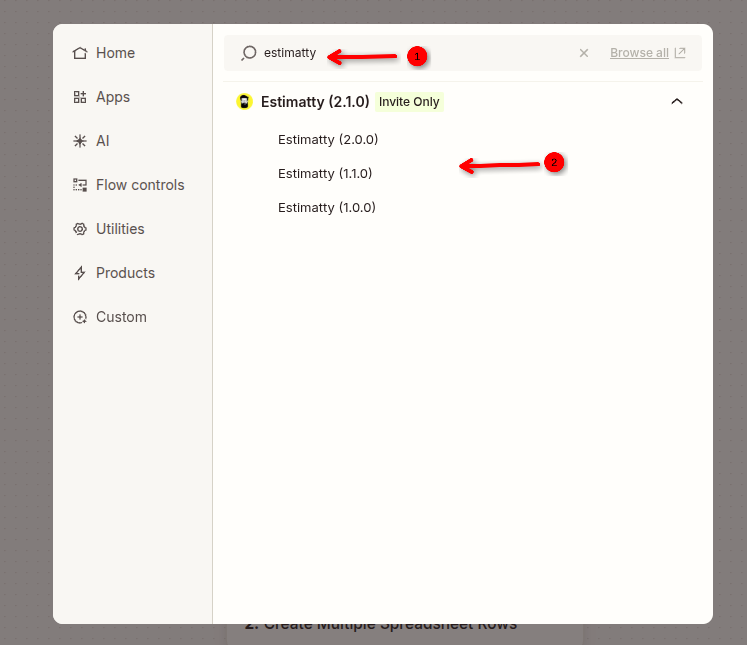
4. Choose the Trigger App: Select “Estimatty” as the trigger app.
📌 Available Zapier Triggers by API Version
Version 1.0 — New Lead Trigger (Legacy)
- What it triggers on: Fires every time a new lead generates an estimate on your Estimatty calculator.
- Fields Included: Contact details (
id,name,firstname,lastname,email,phone,zip), status, estimate summary, total price, breakdowns, and add-on selections. - Note: Does not include the lead’s street address field.
Version 1.1 — New Lead Trigger (With Address)
- What it triggers on: Fires every time a new lead generates an estimate on your Estimatty calculator.
- Fields Included: All fields from v1.0 + full street address (
address) for location-based CRM workflows and dispatch mapping.
Version 2.0 — New Booking Trigger
- What it triggers on: Fires when an estimate is successfully converted into a confirmed booking by the customer.
- Fields Included: Booking ID (
id), booking status (booking_status), scheduled dates (scheduledDate1,scheduledDate2), arrival time windows (arrivalWindow1,arrivalWindow2), payment details (paymentMethod,paymentStatus), property details (propertyDetails), special instructions, booked timestamp (bookedAt), lead contact details (lead_name,email,phone,address,zip), and estimate pricing summary.
Version 2.1 — New Lead & New Booking Triggers (With Marketing & Attribution Info) ⭐ RECOMMENDED
- What it triggers on: Fires on both New Leads and New Bookings, fully enriched with traffic attribution and marketing campaign variables captured when the visitor filled out your widget.
- Ideal for: Syncing campaign data to Go High Level (GHL), Google Ads conversion tracking, Meta Conversions API (CAPI), and attribution dashboards.
📊 Marketing & Campaign Attribution Fields Included in v2.1:
Standard GA4 UTM Parameters:
utm_source(e.g. google, facebook, newsletter)utm_medium(e.g. cpc, email, social)utm_campaign(e.g. residential-recurring, spring-sale)utm_term(e.g. house cleaning near me)utm_content(e.g. banner-ad-1)utm_id(Campaign ID)utm_source_platform(e.g. Search Ads 360)utm_creative_format(e.g. video, search)utm_marketing_tactic(e.g. remarketing, prospecting)
Ad Platform Click & Cookie Identifiers:
gclid(Google Click ID)fbclid(Meta Facebook Click ID)fbc(Facebook Click Cookie ID)fbp(Facebook Browser Cookie ID)event_id(Meta CAPI event deduplication ID)msclkid(Microsoft / Bing Click ID)ttclid(TikTok Click ID)li_fat_id(LinkedIn Click ID)twclid(Twitter / X Click ID)
Raw & Dynamic Payloads:
campaign_raw(Raw URL query string)campaign_params_json(JSON string containing 100% of all URL parameters, including custom tracker tags)
💡 Upgrade Recommendation
Upgrading from v1.0 / v1.1 / v2.0 to v2.1: We strongly recommend updating your existing Zaps to v2.1. Version 2.1 is fully backward-compatible with all lead and booking fields from previous versions while unlocking full ad campaign and ROI tracking.
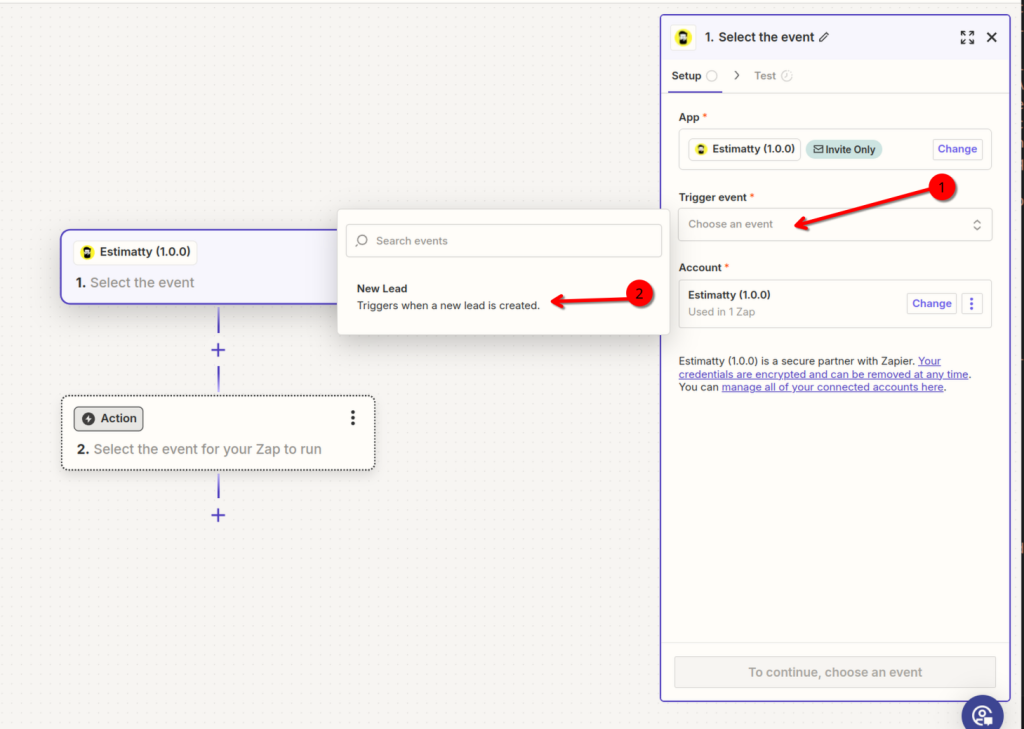
5. Choose the Trigger Event: Select “New Lead” or “New Booking” event.
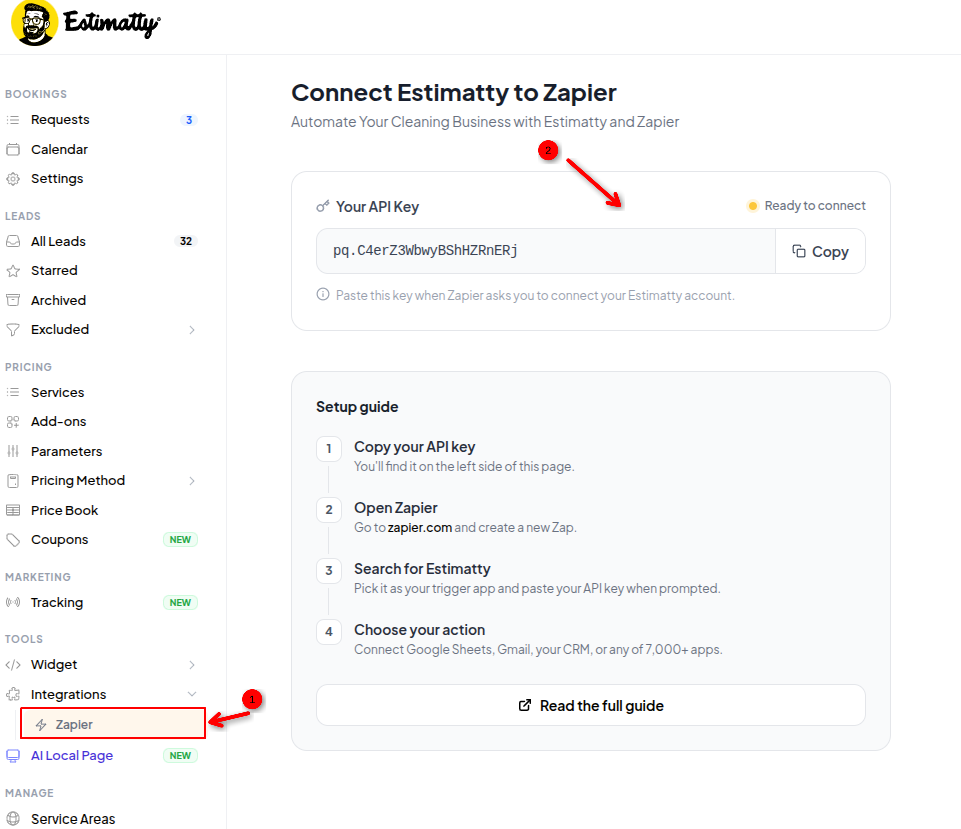
6. Connect Your Estimatty Account: Follow the prompts to connect your Estimatty account to Zapier. You’ll need to provide your Estimatty API key.
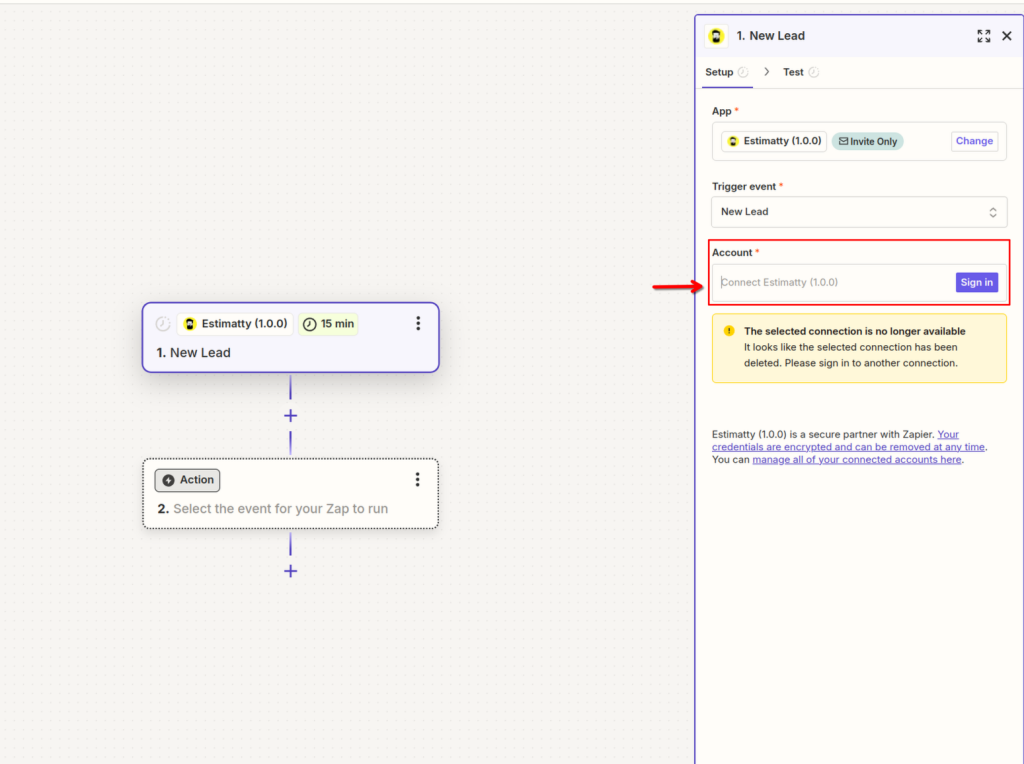
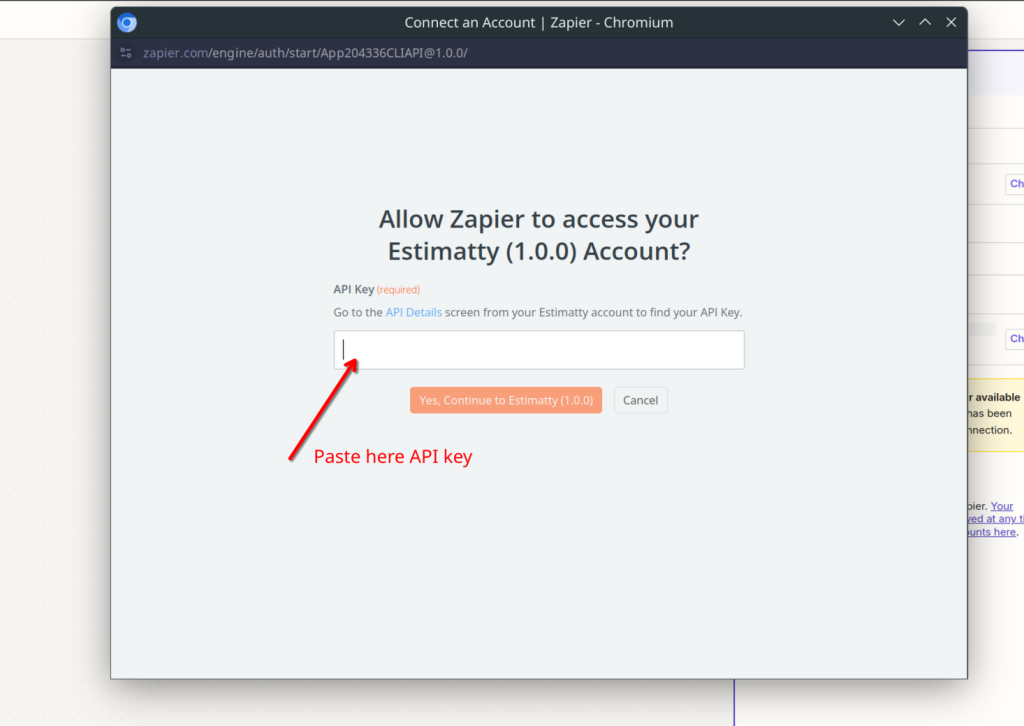
Navigate to the Widget Zapier option in the left-hand menu of your Estimatty dashboard and copy your API Key
📣📣 Note on Zapier Frequency:
The frequency at which Zapier checks for new leads from Estimatty depends on your Zapier plan. While you can set a specific interval (e.g., 15 minutes) in the Zap’s settings, the actual frequency may vary based on your Zapier plan’s limitations.
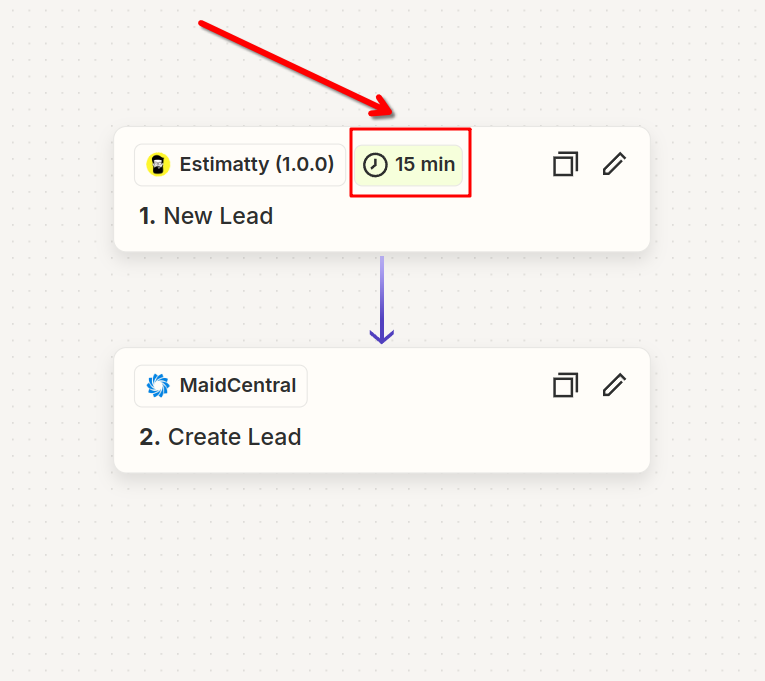
For optimal performance and timely lead retrieval, consider upgrading to a Zapier plan with higher frequency limits.
Check Zapier frecuency settings article
By understanding these limitations and optimizing your Zapier plan, you can ensure that your Estimatty leads are synced efficiently and promptly.
7. Test the Trigger: Test the trigger to ensure it’s working correctly.
8. Choose the Action App: Select the app you want to perform the action. This could be a CRM, email marketing tool, or another application.
9. Choose the Action Event: Select the specific action you want to perform in the chosen app. For example, you might choose “Create a New Contact” in a CRM or “Send an Email” in an email marketing tool.
10. Map the Data: Map the data from your Estimatty trigger to the fields in the action app. This will allow Zapier to transfer the relevant information between the two applications.
11. Test the Action: Test the action to ensure it’s working correctly. Turn On the Zap: Once you’re satisfied with the testing, turn on the Zap to activate the automation.